
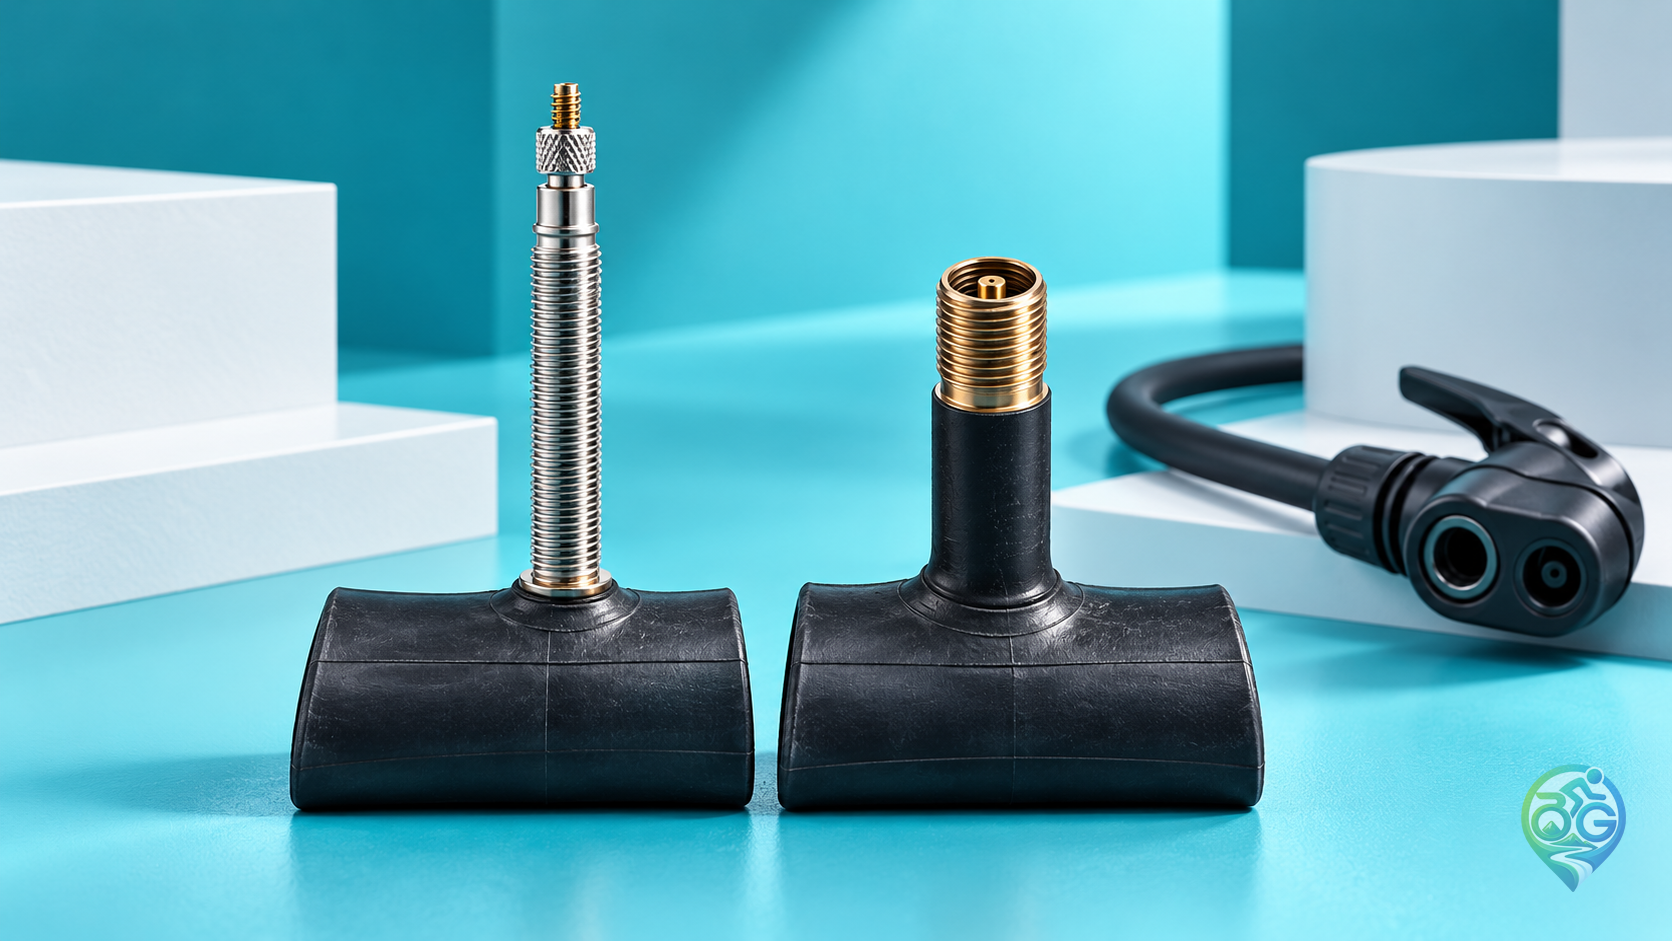
A pump that sends air out beside its head can turn a simple tyre check into a frustrating job. Before replacing equipment or pumping harder, identify the connection you are trying to make. Pump and valve compatibility is a specific question about the head, valve and any approved adapter. It is separate from deciding what pressure suits the ride.
Start with the pump instructions
Find the model’s description of its head. A twin-port head may have separate openings; a single opening may adjust automatically or require a particular configuration. The Park Tool PFP-10, for example, uses a locking universal head that automatically fits Presta and Schrader. That is a model-specific feature, not permission to rearrange the internal pieces of any pump you encounter.
Check how the lever is meant to operate before forcing it. Open and locked positions can depend on the design. If the instructions call for changing a part inside the head, follow the illustrated order for that model rather than assuming that every seal is reversible. Make this a short home preparation job. The trip-planning approach in our route preparation guide gives you room to resolve equipment questions before relying on them roadside.
Identify the valve on each wheel
Park Tool’s valve reference distinguishes the slender Presta stem and its small tip locknut from the wider Schrader stem with a spring-loaded central pin. The Presta tip nut must be loosened before inflation. Do not confuse it with a retaining nut beside the rim. If you have Dunlop or another system, look up its own instructions rather than forcing it into either category.
Inspect the actual parts instead of inferring the valve from the type of bicycle. Check the front wheel, rear wheel and spare tube independently. Keep the packaging or model information for the spare if you find its identification confusing. A clear photograph and product code give a shop more useful information than a guess about a skinny valve. You want the equipment you carry to work with the wheels you will ride.
Make the connection without side loading
Clean dirt from around the valve and align the head as its manufacturer instructs. Avoid pulling the stem sideways. Give the hose a comfortable position instead of letting it support a wheel or hold the bicycle steady. Make a small initial check: does the head stay in place, and does air enter the tyre without an obvious leak at the connection? If it leaks, stop and reseat it rather than increasing force.
If the connection remains poor, check whether the specified head or approved adapter is actually present. An adapter threading onto a part does not prove that the whole arrangement works properly. Inflation and a useful gauge reading can also be different compatibility questions. Look for the manufacturer’s guidance on a worn seal or ask a shop to inspect the setup. Do not modify a rim or cut a valve to make an unsuitable head fit.
Separate a connection problem from an air-loss problem
A correctly attached pump does not explain every tyre that loses pressure. The valve area, inner tube and tyre can require different checks. Set pressure within the tyre and rim manufacturers’ limits, using our tyre pressure guide for the riding variables. Increasing pressure beyond those limits is not a way to investigate a leak. Postpone the ride if the valve is damaged or the tyre will not reliably hold air.
A cut, bulge or other casing damage is a reason to stop riding. If you use a tubeless system, review the tubeless setup and maintenance process separately rather than assuming the same procedure as a tubed wheel. Finally, try your packed pump with both wheels and the spare before leaving. A borrowed pump working on a previous ride does not establish that the combination now in your bag is compatible. That complete check leaves you with a known setup rather than a collection of individually plausible parts.
Discussion & Comments 0
Share your thoughts, gear experiences or ask questions about this guide.
No comments yet.
Be the first to share your thoughts!
Join the Discussion
Log in with your Bisikletli Gezgin mobile account to participate in discussions and track your contributions.